One of the fundamental principles of Git is that it is a distributed version control system. This means you can easily work with your repositories and make changes locally. Much of what has been discussed in this document so far pertains to local repositories. However, to collaborate with others and share your work, you will need to extend your focus to remote repositories.
Git supports a variety of workflows when working with remote repositories, ranging from simple setups suitable for small teams to complex configurations for large, distributed projects. For an overview of different workflow options, refer to Distributed Git - Distributed Workflows. In complex projects, Git is often used alongside tools that facilitate code review. A popular tool for managing reviews in Git repositories is Gerrit (https://www.gerritcodereview.com/). You can integrate Model RealTime with Gerrit, either through Gerrit's web-based interface or by utilizing the review features in Mylyn (http://www.eclipse.org/mylyn/). Additionally, the EGerrit plugin for Eclipse (https://www.eclipse.org/egerrit) offers further support.
In this section and in Collaborating within a Team using Remote Branches, we will focus on a straightforward workflow where you work directly with a remote Git repository, assuming you have both read and write access.
A more advanced approach is detailed in Working with Remote Repositories using Gerrit Review Support, where we explore contributing to a shared repository managed with Gerrit.
If you followed the Getting Started instructions in Accessing a Remote Git Repository you most likely already have at least one remote repository configured. From the command line, you can use the git remote -v command to get information about what remote repositories are configured for your current local repository.
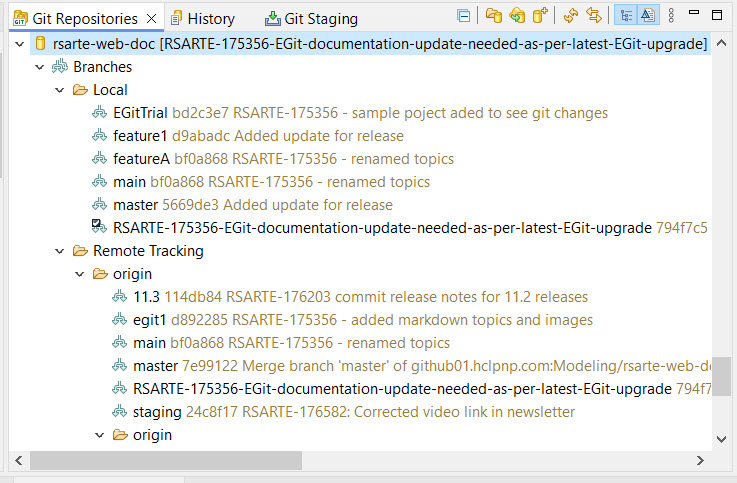
In the Model RealTime GUI this information is most easily seen in the Git Repositories view. To see what remote repositories are configured expand the ”Remotes” node in the outline. This is what the Git Repositories view could look like if you have cloned a remote repository to get started.
In the above image, we set up a remote connection called “origin” to a remote repository. The image also shows the web addresses (URLs) for pushing and pulling the data to and from this remote setup.
To ensure that local and remote repositories are not too tightly coupled Git introduces a special mechanism to locally keep track of the state of a remote repository. This is the concept of remote tracking branches.
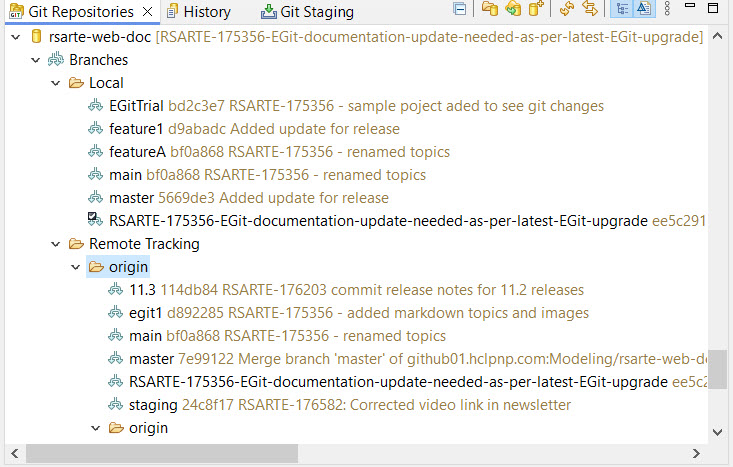
In our example above we have a remote repository called "origin". To track the state of this remote repository we will in our local repository have one or more branches only intended for this purpose. These branches can be seen in most of the relevant views in Model RealTime. Let us first check the Git Repositories view. If you expand the "Branches" node for your repository you will see that there now is another set of branches, shown in the "Remote Tracking" part of the outline.
![]()
In our simple example we only have one remote repository named "origin" and we can see that there is only one branch "origin/master" that we track from this remote repository.
The remote tracking branches will be visible also in other views where branches are visible. For example the remote tracking branches are also visible in the History view.
This is what the simplest possible example can look like. This is the history of a newly created repository with one "origin/master" remote tracking branch (and one local "master" branch).
Note that the remote tracking branches are read-only from a local point of view. They will only be updated when you use various commands to synchronize the state of your local repository with the remote repository.
It is easy to update the local repository with changes done in the remote repository. The most basic way of doing this is using the ”Fetch” command. In our simple example from the previous section the command git fetch origin would retrieve any changes done in the remote repository called ”origin” and make them available in the remote tracking branch ”origin/master”.
In the EGit GUI the Fetch command is of course also available, for example if you select a remote repository in the Git Repositories view.
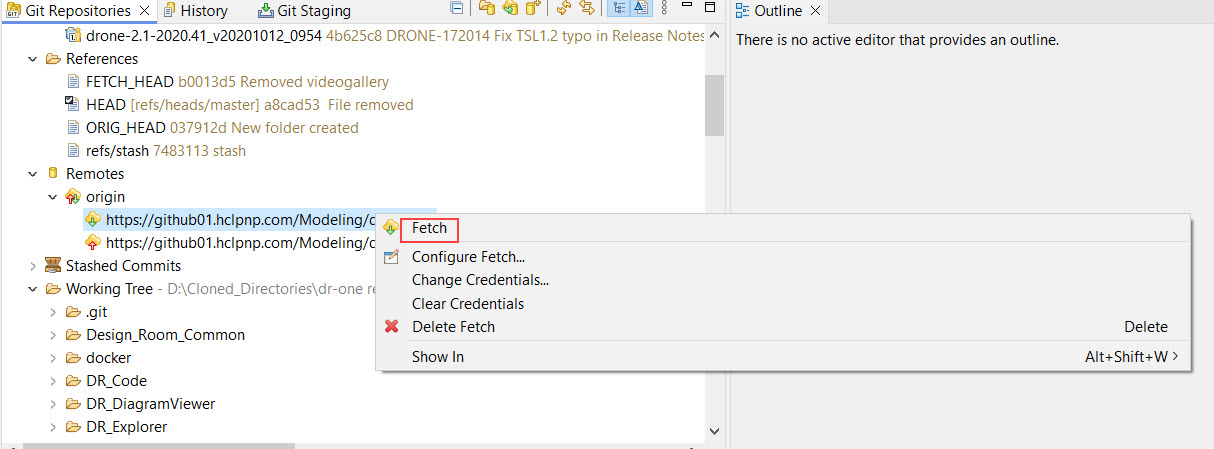
Note that the Fetch command only changes the remote tracking branches of your local repository. No local branches are updated.
Assume someone has updated the remote repository named "origin." After executing the Fetch command, your local repository now has the updated history from "origin." While your local "master" branch remains on the same commit, the "origin/master" tracking branch reflects the changes made on the remote "master" branch. To integrate these changes into your local "master" branch, you can use the Merge command as you would with any other branch. However, for a more streamlined approach, consider using the Pull command, which combines Fetch and Merge into a single operation.
To make it easier to incorporate changes from remote tracking branches to our local branches (and vice versa) it is possible to define an upstream configuration for a local branch. If you have used the Clone command to get a copy of a remote repository, this has already been done for you.
To check and update the upstream configuration for a local branch we can use the command Configure Branch from the Git Repositories view.
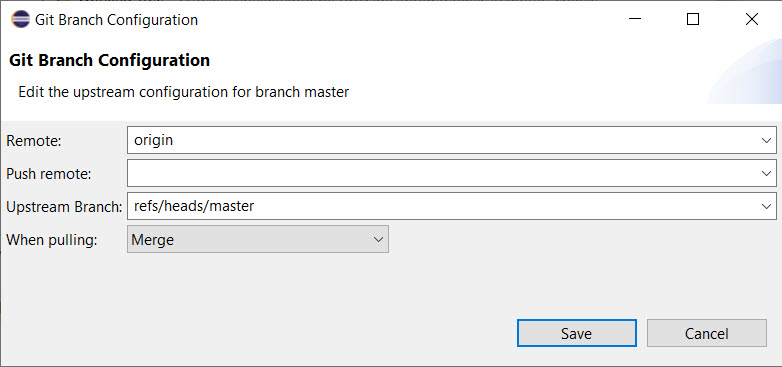
In this case we can see that the local ”master” branch is defined to have an upstream remote tracking branch that is the ”master” branch on the ”origin” remote server. (You can ignore the ”refs/heads/” part of the name for now.)
The upstream configuration is what enables us to use two commands to update our local repository from the remote and vice versa:
The Pull command fetches the latest changes and automatically adds them to our local branch. The "When pulling" drop down menu in the Git Branch Configuration dialog allows you to configure how Pull should add the changes to our local branch. By default it will use Merge but you can also configure it to use Rebase.
The Push command does the opposite. It takes our latest local changes, sends them to the remote repository, commits them and fetches back the changes to the remote tracking branch.
The two commands are described in the sections below.
If you have an upstream configuration for a branch that identifies a remote tracking branch, and thus also identifies a remote repository, you can use the Pull command instead of doing a Fetch followed by a Merge. Pull will first do a Fetch from the remote repository to retrieve the remote changes and then automatically merge the changes (either using Merge or Rebase).
Note that the Pull command is based on the branch that is currently checked out and will change the files you currently have in the working tree similar to what the corresponding merge would have done. Often it can therefore be good to do a Fetch before invoking the Pull, just to be able to inspect what changes will be merged into your branch if you proceed with a Pull.
You can invoke the Pull command for example from the Git Repositories view on any local repository.
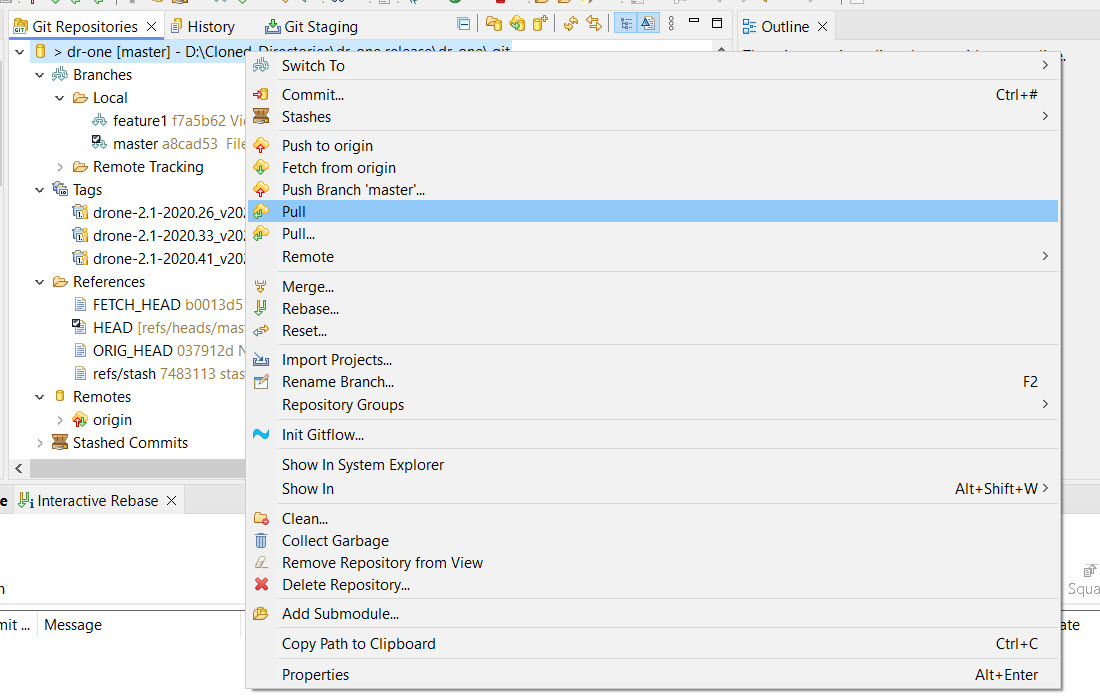
Use "Pull" to perform the Pull according to the upstream configuration for the branch, and use "Pull…" if you want to perform the Pull using different settings.
To be able to push your local changes in a simple fashion to a remote repository, you need to have both a remote tracking branch and an upstream configuration. There are other, more advanced ways, to determine what and how to push, see for example the EGit Tutorial or the Git Reference for details. However, the most convenient mechanism is based on using remote tracking branches and the upstream configuration to handle the mapping and that is what we'll use now.
You can invoke the Push command from the command line using the command git push origin master. Here "origin" indicates the remote repository and "master" is the branch to push.
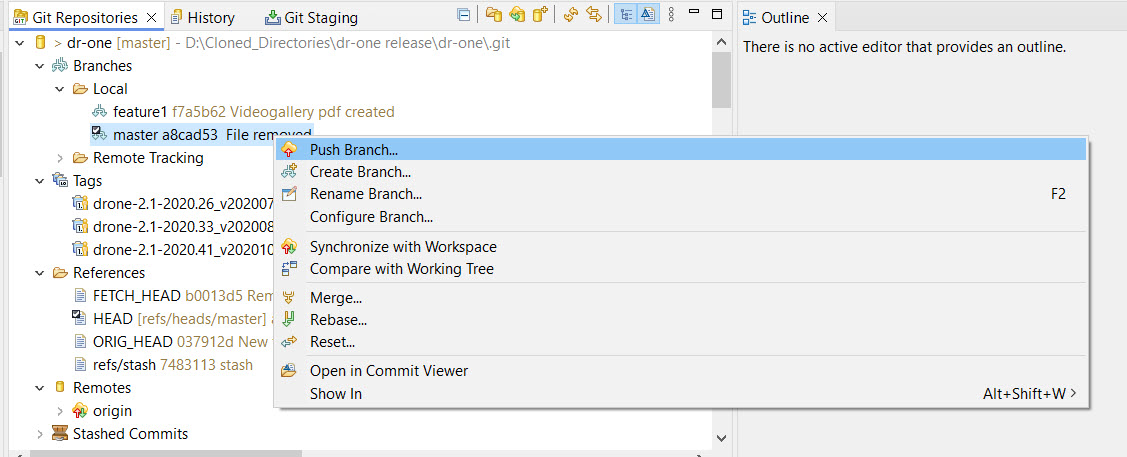
From Model RealTime you can do a Push from the Git Repositories view. Identify the branch you want to push and use the "Push Branch" command in the context menu.