Before diving into specific workflows, it is important to familiarize yourself with the main EGit views. EGit integrates three key views that you will use regularly:
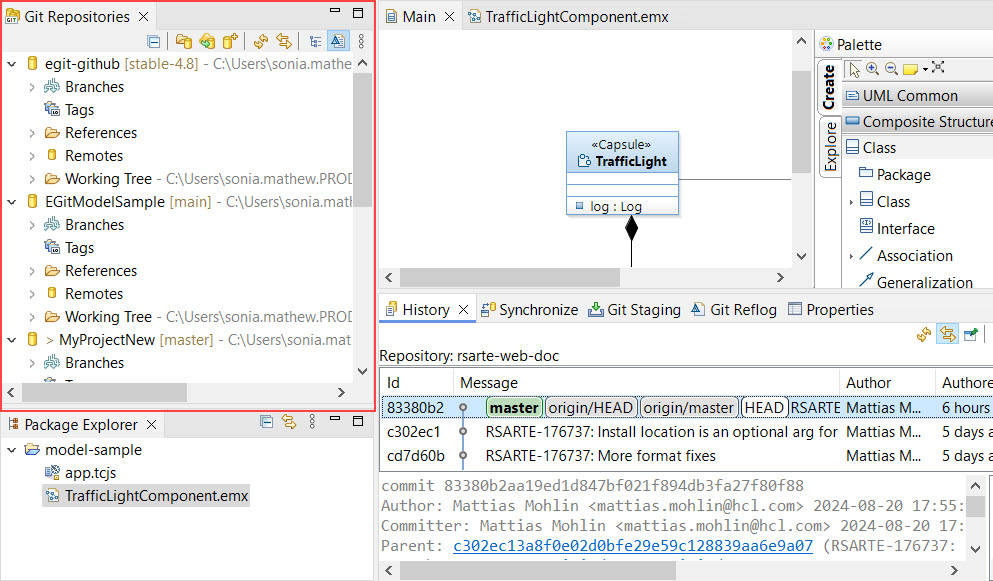
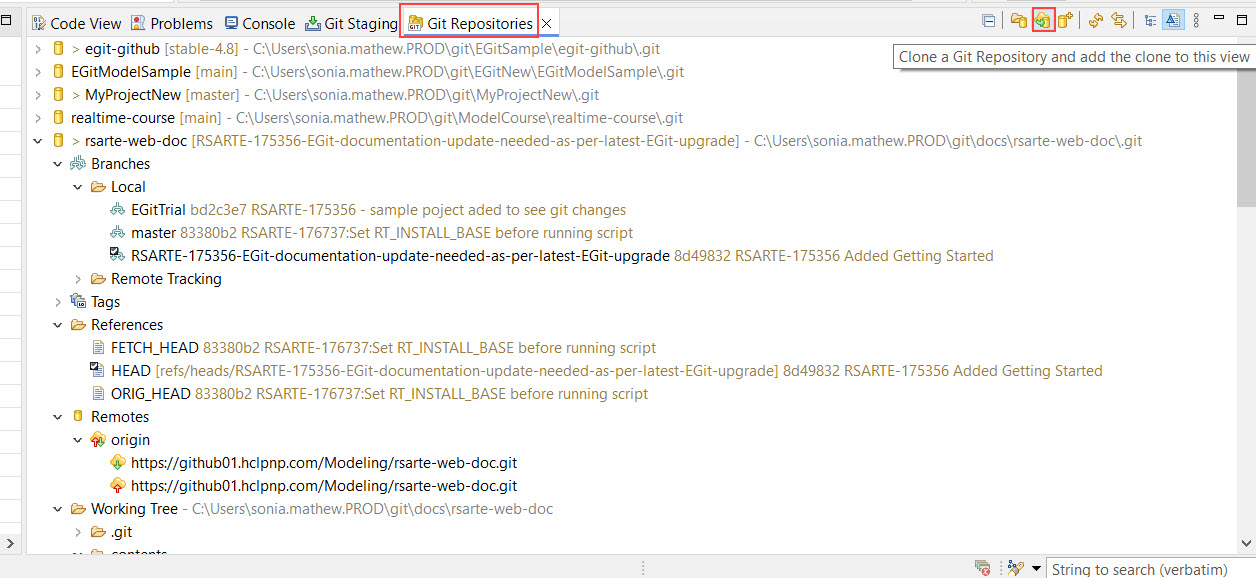
The Git Repositories View provides a summary of the Git repositories you are working with.
This view displays information about the branches, remote repositories, and file system locations of each repository.
The Git Staging View is likely the first view you will encounter.
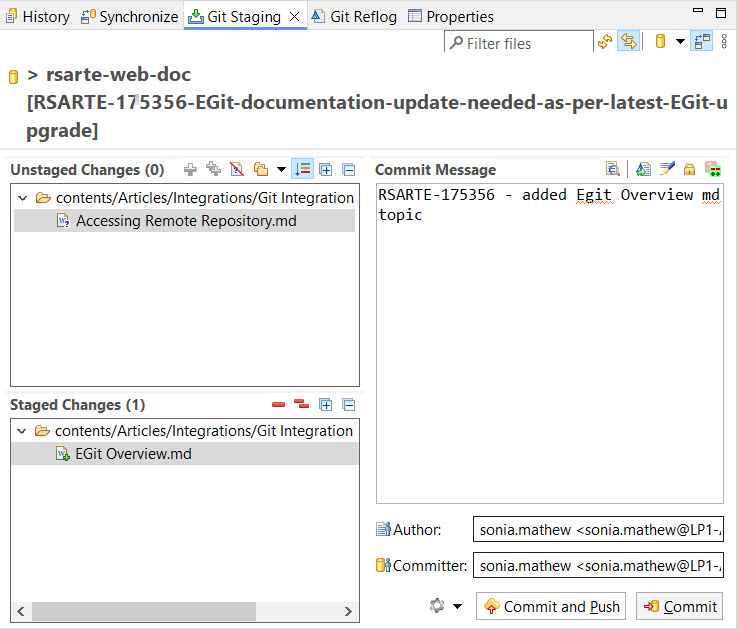
This view allows you to monitor the state of your working tree, review which files have changed, and stage changes for committing to the Git repository. Detailed instructions on how to work with this view can be found in the Git staging section.
While the History View is not exclusive to EGit, it is utilized for displaying Git-related history when working with Git.
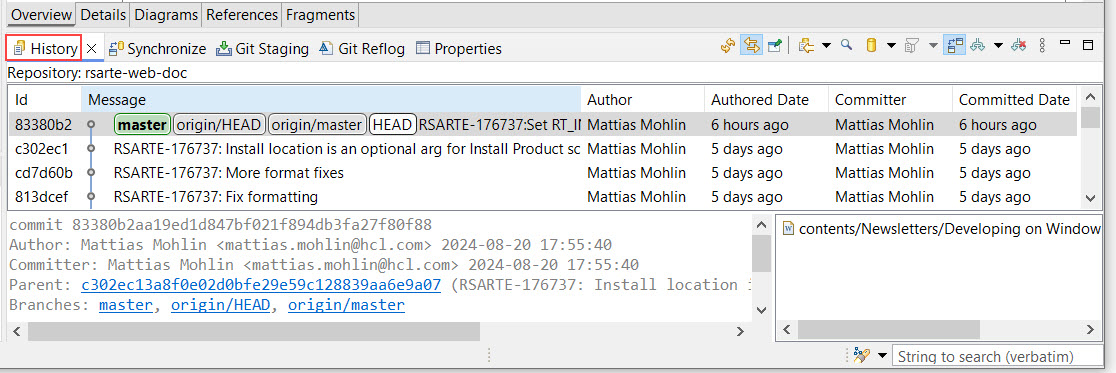
The History View is useful for reviewing past actions performed on your project. It provides a searchable, date-sorted, graphical representation of commits. More details can be found in the Git History section.
In addition to the views, EGit also provides a top-level menu and a toolbar.
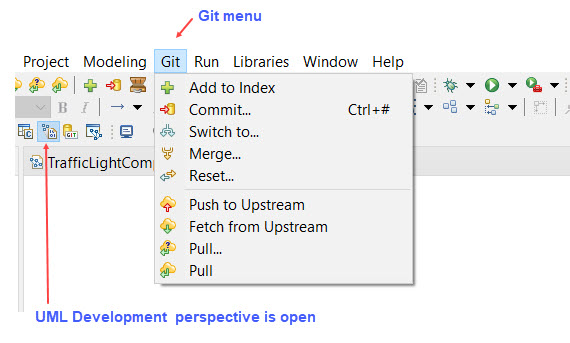
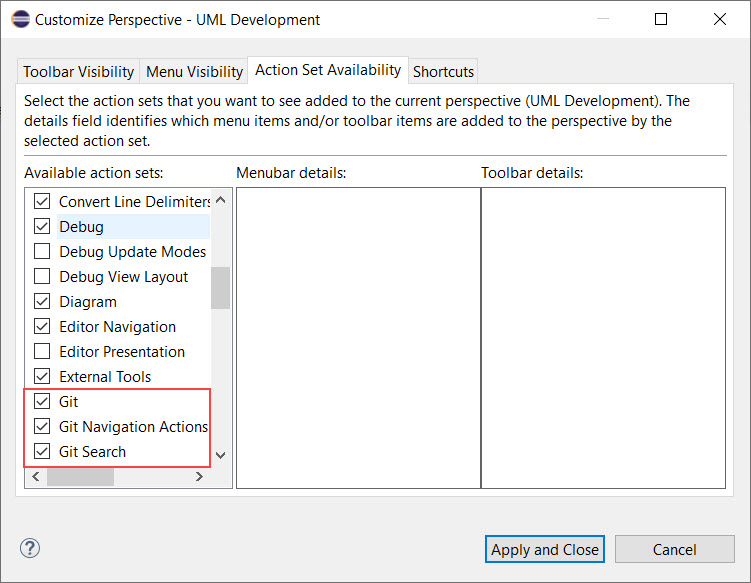
Note: This menu and toolbar are not visible by default in the UML Development perspective. To enable them, use the command Window – Perspective – Customize Perspective. In the Action Set Availability tab, check Git and Git Navigation Actions.
Although the top-level Git menu and toolbar are not essential (as all commands are accessible through the EGit views and context menus), they can be convenient in certain situations.
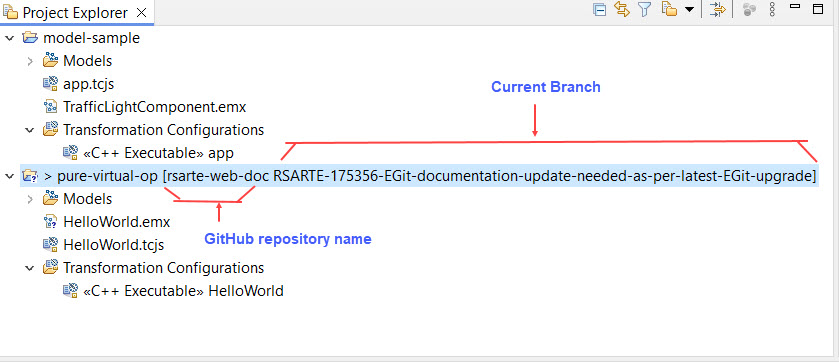
You can confirm if EGit is installed as part of Model RealTime in several ways. One clear indicator is that the Project Explorer annotates all Git-managed projects with the repository and current branch.
Additionally, when you perform any Git operation that alters the working tree, such as loading a new workspace or switching branches, EGit updates the status information. This is visible in the status bar at the bottom of the Model RealTime window.
Git is a distributed version management system, that relies on a local repository storing information about the different versions of files and directories. A Git repository is a directory containing a copy of all files and folders plus a special top level directory called “.git”. This special directory contains the version information for all files and directories in the repository.
There are several different schemes available when combining Git with Eclipse projects, but in general it is recommended to have the “.git” repository directory outside of the Eclipse project structure. A typical structure is thus:
MyApplication: The root folder of the repository.
.git: The Git version information directory
Project1: First Eclipse project
Project2: Second Eclipse project
A structure similar to this is expected by most commands in EGit and will improve the performance of the tools.
A common first step is often to get access to an existing remote Git repository. This can be done from the command line using the clone command:
git clone
An example structure is the following:
/home/user/git
gitRepo1
gitRepo2
Whenever you need to access another remote Git repository just start a command shell in the directory corresponding to /home/user/git and do a git clone
It is also possible (and convenient) to clone the repository from inside Model RealTime. This can be done in the Git Repository view.
The Clone Git Repositories dialog that appears makes it possible to specify the source of the repository. The easiest way to fill in this dialog is to simply paste a URL into the top URI field. Then most of the other fields will be populated automatically. For example:
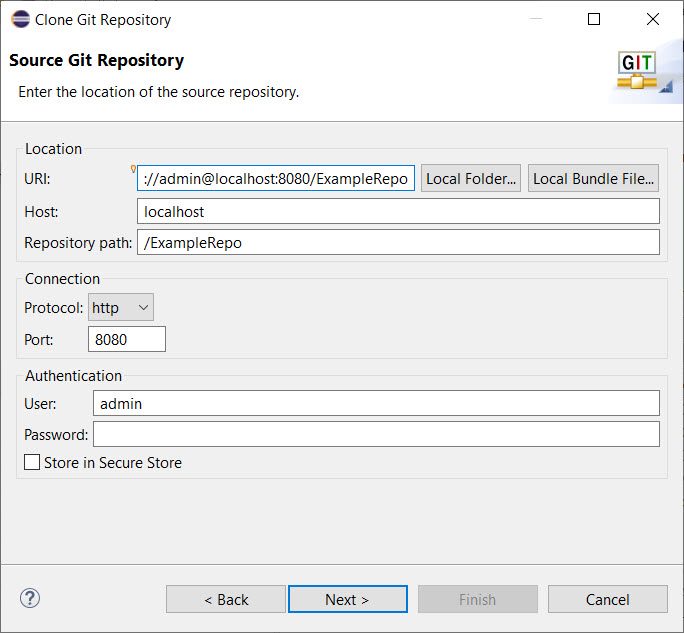
On the wizard pages that follow you can specify where in the local file system the repository will be located and also give a possibility to import any contained Eclipse projects into the current workspace.
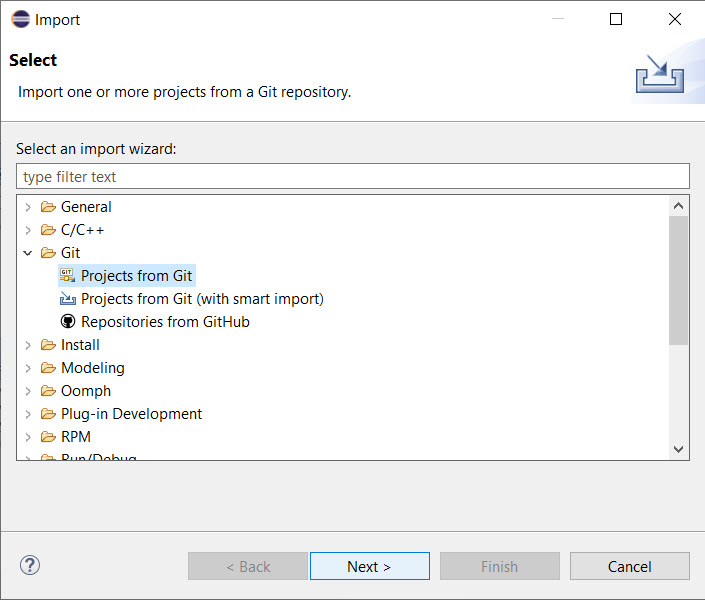
To get access to an existing local Git repository from Model RealTime we can use the command File - Import… and choose ”Projects from Git”:
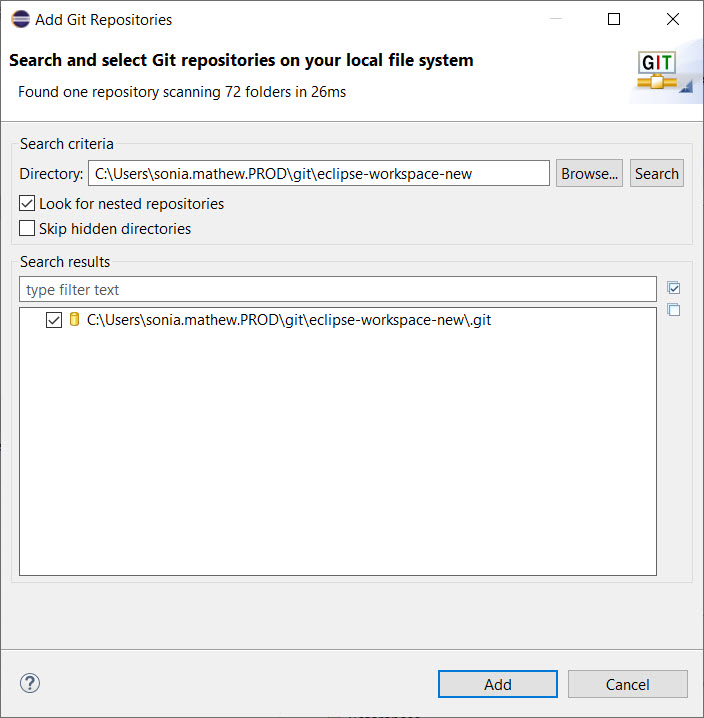
In the ”Import Projects from Git” dialog press the Add button, and enter the path to where you store your Git repositories.
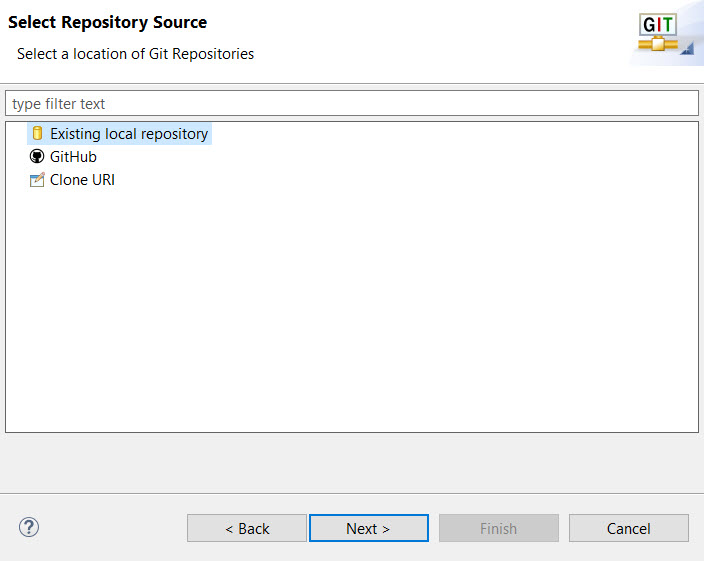
Select the Git repository you want to import and then press Finish. Then proceed to the next page in the import wizard where you can choose how you want to import the repository. If the Git repository contains one or many Eclipse projects you typically want to choose ”Import existing Eclipse projects”.
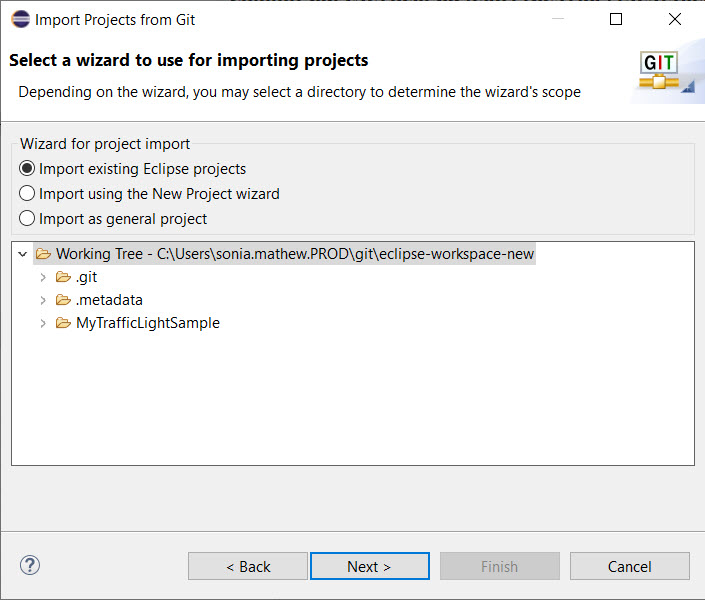
The final wizard page shows you the list of found Eclipse projects that will be imported. Press Finish to import them. Note that imported projects will be referenced from your workspace but will remain stored in the Git repository directory. This is important to remember since you sometimes may use Git commands from the command line and they need to be invoked in the Git repository in the file system.
If you have an existing local Model RealTime project that you would like to store in a Git repository, the easiest way is to use the Team - Share Project command in the context menu of an Model RealTime project. If you have support for multiple versioning systems a dialog will ask you which one to use. Choose ”Git” as the repository type and press Next to configure the Git repository to use.

In the “Configure Git Repository” dialog choose an existing Git repository in the drop down menu, or create a new one by pressing the Create button. Note that it’s generally not recommended to mark the checkbox to create the repository in the parent folder of the project. See the tooltip of the checkbox for more information.
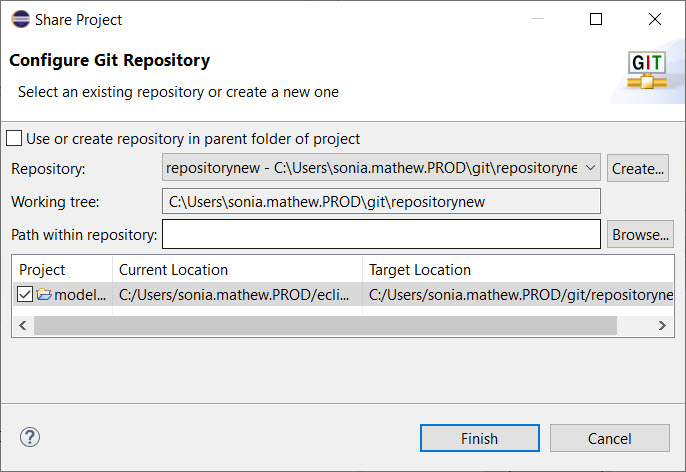
Assuming that you specify a new Git repository to be used for storing your project, the following will happen when you press the Finish button:
A new Git repository will be created and initialized in the specified location
Your project will be moved in the file system from your workspace location to the Git repository location
Your project will be re-imported into Model RealTime from the new location
You are now ready to start managing the project files using Git and EGit features. Note that one thing that does NOT happen automatically is to commit an initial version of the files to Git. See the discussion on the Git Staging View below for more information on how to accomplish this.