Let's start by examining how to compare two versions of the same model. This scenario is simpler than merging, which involves three models, two versions being compared and a common ancestor model. By beginning with the two-version comparison, you can establish a solid foundation for understanding the comparison process.
The two models being compared are referred to as contributor models. One will be displayed on the left side of the Compare user interface, while the other will be on the right. Therefore, these are often called the left contributor and the right contributor, respectively. The Compare tool will highlight the differences between the two models, indicating the necessary changes to the right contributor to make it identical to the left contributor.
This ensures you can read the changes that are presented by the Compare tool and understand what has happened with the model from its older version to its newer version. It's recommended that the newer version of the model be placed on the left (left contributor) and the older version on the right (right contributor). This arrangement allows you to visualize the changes from the older to the newer version.
In This Topic:
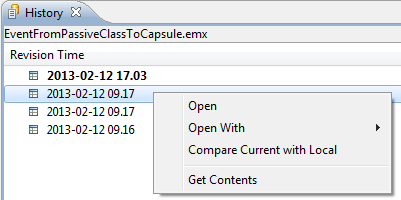
Model RealTime has a feature to save the history of workspace files that are modified. This feature can be set up in the preferences at General - Workspace - Local History. With this feature enabled, Model RealTime will save a copy of each file that gets modified, and thereby create a history of all changes that has been made to that file. You can look at this history by right-clicking in the Project Explorer on a model that is stored in its own file, and perform the command Team - Show Local History.
The version shown in boldface is the current version of the model. If you right-click on a previous version and perform Get Contents it will create a new version of the model which is a copy of the selected version. This is useful in case you want to go back to a previous version of a model, and you have not stored that version in the CM system.
If you do Compare Current with Local Model RealTime will launch the Compare tool to show the differences between the current version and the selected version of the model. You can also select two arbitrary versions in the list and do Compare With Each Other to compare those particular versions of the model.
When you compare models using the local history feature, the left contributor will be the newest of the two models.
Comparing files in the local history is a special case of the more general workflow when model files from your local file system are compared. You can select any two elements in the Project Explorer that are stored in their own files and invoke Compare With - Each Other in the context menu. The Compare tool will be launched to show the differences between the selected models. To give a useful result, the selected model files must be versions of the same model.
You can also invoke the Compare With - Each Other command with three model file elements selected. In this case, one of the model files should be the common ancestor of the other files. The common ancestor model is the model from which both the two compared model versions originate. Read more about this in Merging Models. A dialog appears to let you choose which of the selected model files as the common ancestor model:
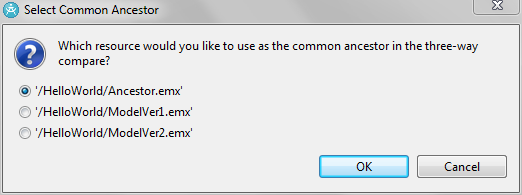
A compare that involves a common ancestor version of the model is called a three-way compare. If there is no common ancestor specified, the compare is then two-way. The Compare tool can in general do a better job with identifying and presenting the changes that have been made if a common ancestor model is available. This is usually the case when doing compare on files stored in a CM system.
You can also compare files in the file system from the command-line using the Command Line Tool for Compare/Merge.
For files that are controlled by a CM system, you can in addition to the local history (which is stored in the workspace) also look at the history of the file that is stored in the CM system. From there you can launch the Compare tool on different versions in much the same way as you can from the local history view. However, in a CM system you can have more than one parallel stream of development, which means that the history of a file is typically better shown as a tree rather than a list. Different CM tools provide different history views.
Right-click the Project Explorer on a model that is stored in its own file, and perform the command Team - Show History. A view will appear that shows the versions of the file in ClearCase:
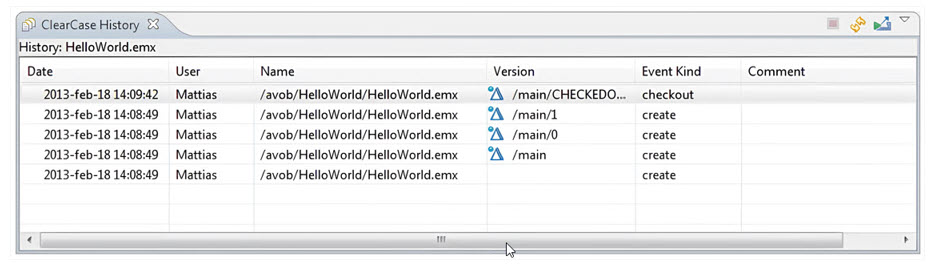
This view shows the versions of the file as a flat list. To instead view the file's version tree, right click on a file version in the list and do Show Version Tree. Here is an example of a very simple version tree for a model file "HelloWorld.emx" which is controlled by a ClearCase dynamic view:
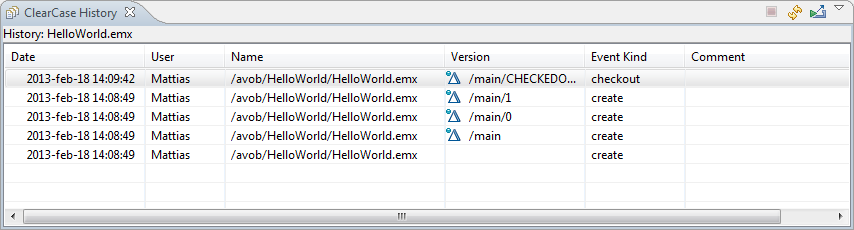
Here we can see that the main stream has two versions of this file (version 0 and 1), and that the file is currently checked out to allow a third version to be created. To launch the Compare tool on versions of the model file that is shown in the version tree you can right-click on one version and perform Compare With Predecessor. The left contributor will then be the selected version and the right contributor will be the predecessor version. You can also perform Compare With Another Version, and then click on the version you want to compare against. The version you invoke the command on will be the right contributor model and the version you click the next time will be the left contributor model. It is therefore important to select the versions to compare in the correct order, so that you start with the oldest version first. For example, if we would like to see what has happened from version 0 to version 1 in the picture above, we should first select version 0 (right contributor) and then version 1 (left contributor).
You can also launch the Compare tool from the command line. For example, the equivalent of the above mentioned compare operation would be
cleartool diff -graphical HelloWorld.emx@@\\main\\0 HelloWorld.emx@@\\main\\1
Note that also here the first specified version will be the right contributor, and the second specified version will be the left contributor. See Compare/Merge Server for more information about how command-line invocation of Compare/Merge works.
Right-click the Project Explorer on a model that is stored in its own file, and perform the command Team - Show in History. A view will appear that shows the versions of the file in Git:
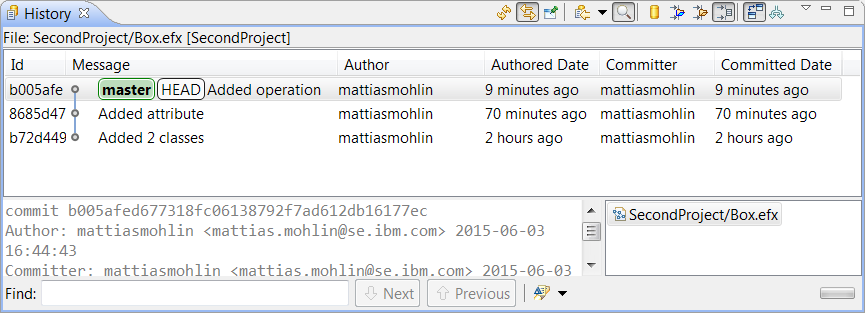
The Git history view actually shows the history of commits, and by default when you invoke it on a particular model file the commit history is filtered to only show the commits that contain changes in that file. You can use the buttons in the view toolbar to widen the scope so that you can look at the commit history for the parent folder, the containing project or even the entire Git repository.
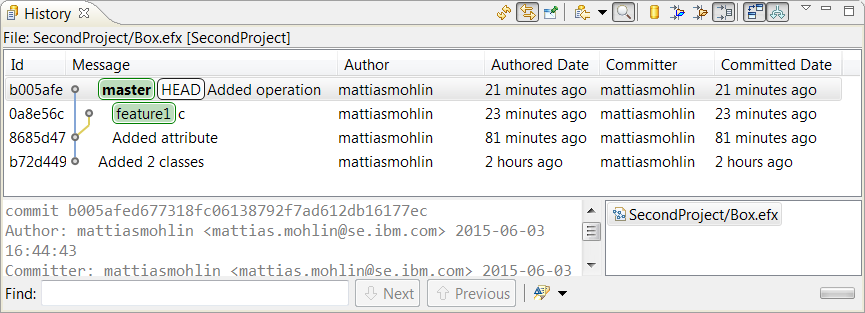
To view the full version tree, rather than a flat list of commits, click on the toolbar button Show All Branches and Tags. The History view will then not only show the list of parent commits for the checked out commit, but also commits on other branches:
You can compare any commit with the version of the model you currently have in the workspace. Right-click on the commit and perform Compare with Workspace. The right contributor will be the selected commit, and the left contributor will be the workspace version.
More variants of this command are available in the Compare With context menu for an element in the Project Explorer that is stored in its own file. The commands in that menu can be used for comparing the model of the selected file with the version of a particular commit, branch, tag or reference. You can also compare it with the staged version that is currently in the Git index and with the HEAD revision. Compare Index with HEAD compares the version of the file that is in the index with the HEAD revision.
If you select two commits in the History view you can compare them by performing Compare with Each Other in the context menu. The right contributor will be the commit that has the oldest authored date, and the left contributor the one with the newest date.
A compare session can also be launched from the Git Staging view which shows files that are currently unstaged (locally modified) and staged (added to the index). You can simply double-click on a file shown in this view to launch a compare session which shows the changes in the file compared to the HEAD revision.
It is possible to launch the Compare tool from the Git command line. You need to configure the git difftool to invoke the Command Line Tool for Compare/Merge.