
There are many situations where it's useful to get a preview of what the code generated by Model RealTime will look like. Some examples include
How will the generated code be affected if I set a certain property on a model element?
How will the generated makefiles be affected if I set a certain property in my transformation configuration?
Will the code generated for one version of my application differ from that generated for another version of the application, and if so, how?
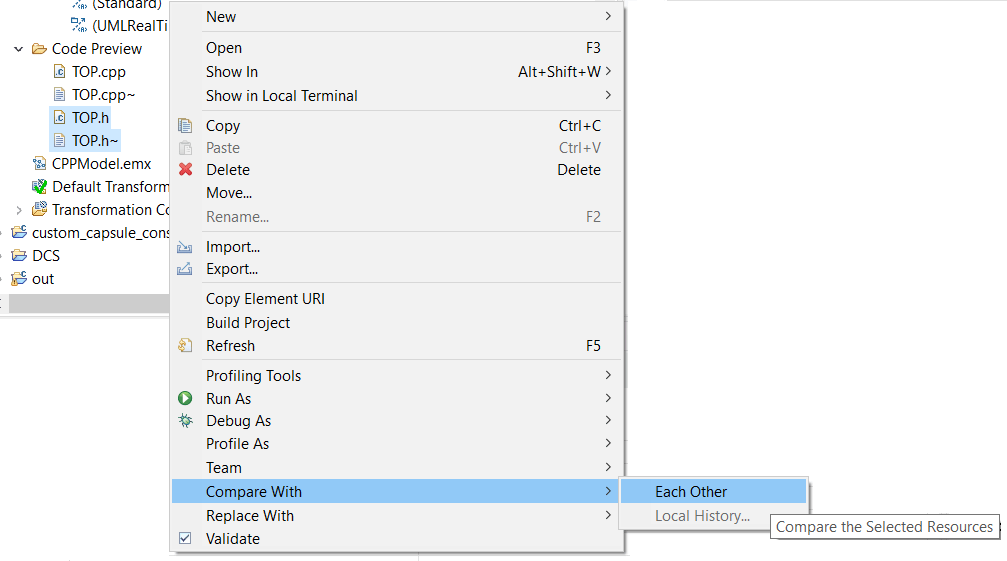
Model RealTime now contains a feature for quickly generating a preview of the generated code that can help you answer questions like these. The code preview can be generated for individual model elements and is significantly faster than doing a full code generation based on a transformation configuration. It also makes generated files easily accessible from within the Eclipse IDE so that you for example can compare the generated code for different model elements, or more commonly, different versions of the same model element.
To generate code preview for one or many model elements, select them in the Project Explorer and invoke the context menu command Generate Code Preview. A dialog will appear:
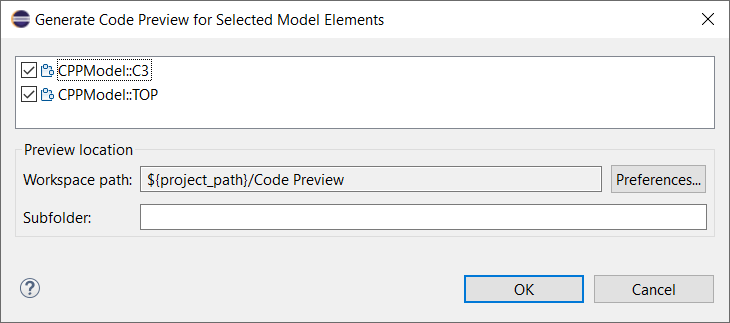
By default the code preview will be placed under a folder "Code Preview" in the project that contains the selected elements. You can change this location in the preferences (and if the model elements come from different projects it's recommended to do so). You can also specify a subfolder and this can be useful for example to give a name that describes the version of the generated code.
If an older version of a generated file exists in the preview location, it will be renamed by appending '~' to its name, before the new version of the file is generated. To learn how a change in the model will affect the generated code you can follow these steps:
You can also generate code preview for a transformation configuration. In this case you can choose if you want to get a preview for only generated source code, or also for the makefiles.
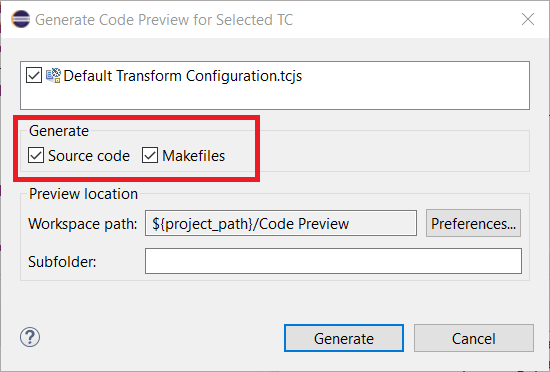
Hence you can follow the same approach as outlined above for looking at differences in the makefiles that will be used for building your application.
The files generated by the Code Preview feature are very similar to the files that will be generated by the Model Compiler when you build your application. However, there are a few small differences due to the fact that the Code Preview feature has a limited context. For example, when you generate code preview for a single model element, there is no TC available, and hence the correct #include of the unit header cannot be generated. You will instead get this:
#include <.unitName.h>
However, given that the Code Preview feature is designed to be used to compare two versions of a file, such differences will not matter. They will be the same in both versions of the preview file and will therefore not show up in the code comparison.
A very common usecase for the Code Preview feature is to use it for comparing different versions of a model at code level. This can be a good alternative or complement to doing a regular comparison at model level, especially if you are only interested in if there are any changes that will affect the behavior of the application. If generated code for two versions of a model is the same you know the application will behave identically, even if the two model versions are different. Here are the steps you can follow in order to use the Code Preview feature to compare two versions of a model at code level:
Note that files generated by the Code Preview command are stored in a folder in the file system. If that folder is in a Git repo, you can add it to the .gitignore file to avoid the code preview files to show up as new files (normally you don't want to commit a code preview folder to source control). Alternatively, just delete the code preview folder when you no longer need it. There is a handy command for deleting all code preview folders in one go: File - Remove All Code Preview.
Last but not least, if you start using the Code Preview feature frequently you probably want to use its key binding which by default is Alt + Shift + E. As usual you can configure this key binding in the preferences at General - Keys.
For more information about the Code Preview feature, see this video.