Before you can use OneTest Embedded with Model RealTime you must make some preparations. This article gives a brief overview of how OneTest Embedded works, followed by the steps you need to take to obtain coverage information for the state machines in your application.
HCL OneTest Embedded works by instrumenting an application so that interesting information can be obtained when it runs, for example information about coverage. The instrumentation is done by preprocessing the C++ code generated by Model RealTime before it's built. A script called rtistcc is responsible for this instrumentation, and it's used both as compile and link command in the TC.
To make the instrumented code independent of which target configuration that is used, OneTest Embedded uses something called a Target Deployment Port (TDP). It's a concept similar to target configurations in Model RealTime and encapsulates everything that is specific to the target environment where the instrumented application will be built and run (compiler, linker, target architecture etc).
The first step you need to do before using OneTest Embedded is to prepare the TDP that you will use. There is a large number of TDPs included with the OneTest Embedded installation, and they are placed in your user folder (the typical location on Windows is C:\Users\<USER>\AppData\Roaming\TestRealTime\<version>\targets\xml). The following TDPs are the ones that correspond to the target configurations that are supplied with Model RealTime:
| TDP | Target Configuration |
|---|---|
| cxlinuxgnu.xdp | LinuxT.x64-gcc-12.x |
| cmingw64.xdp | WinT.x64-MinGw-12.2.0 |
| cvisual2022_64.xdp | WinT.x64-VisualC++-17.0 |
| cvisual2022.xdp | WinT.x86-VisualC++-17.0 |
Use the HCL OneTest Embedded Target Deployment Port Editor and open the .xdp file for the TDP that matches your Model RealTime target configuration. In this editor you may have to make some adjustments in the TDP, for example to specify where your compiler is installed.
Refer to the OneTest Embedded documentation for more information about TDPs, including how you can create your own in case you use a custom target configuration.
Note: If you want to use OTE 8.3.2 with MinGw-12, TDP modifications described in article KB0104021 are required.
When you have made necessary adjustments to the TDP, press the Save button in the TDP Editor. This will create a folder for your TDP next to the 'xml' folder that contains the .xdp file. Open the file tdpGen.log in that folder and make sure the generation of the TDP was successful.
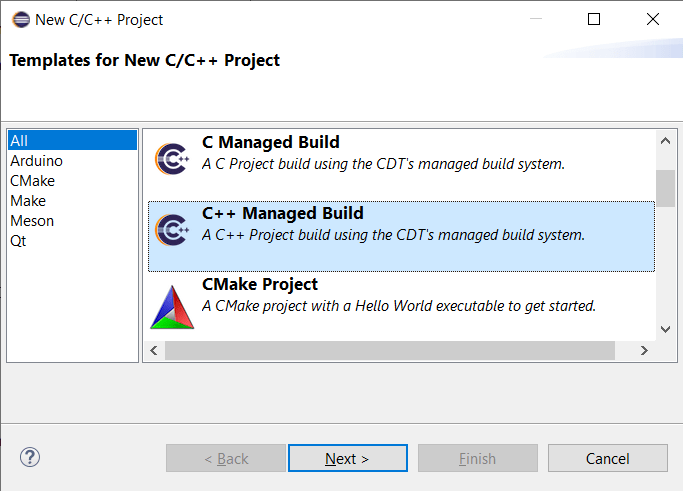
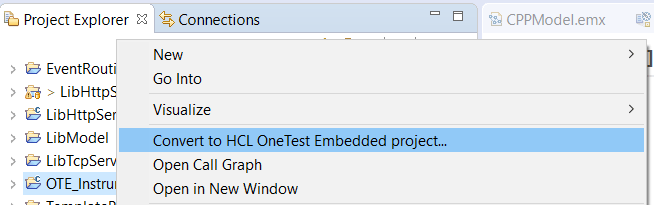
The instrumentation script uses settings that are stored in an instrumentation project. This Eclipse project is also used as a container for the results collected by OneTest Embedded when running the instrumented application. You can create an instrumentation project by following these steps:
On the next wizard page give the project a descriptive name, and click Finish.
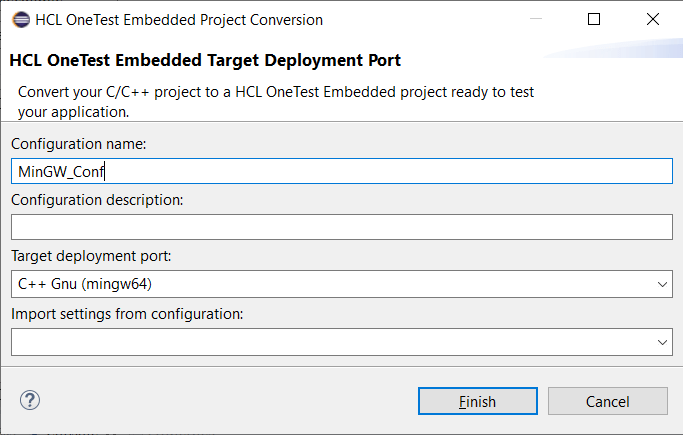
If you don't find a suitable TDP in the list, make sure you have completed the steps described in Prepare the Target Deployment Port. Also make sure that the preference HCL OneTest Embedded - Target Deployment Port - Target deployment port path list includes the folder where your TDPs are located.
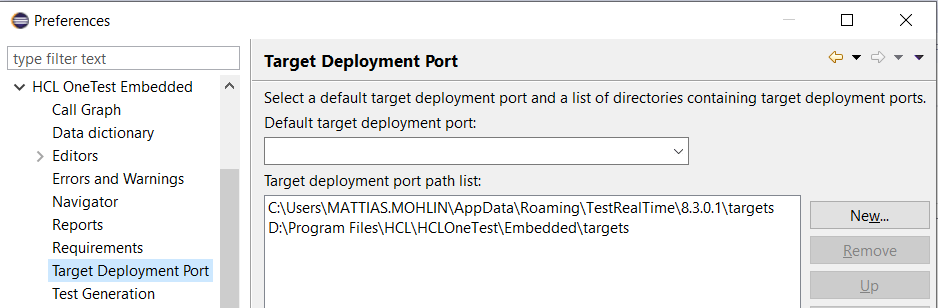
Finally note that if Model RealTime was open when you generated your TDP you have to restart Model RealTime before the generated TDP becomes visible in the "HCL OneTest Embedded Project Conversion" dialog. You can use the Eclipse view "Target Deployment Port" to see the list of TDPs which OneTest Embedded knows about.
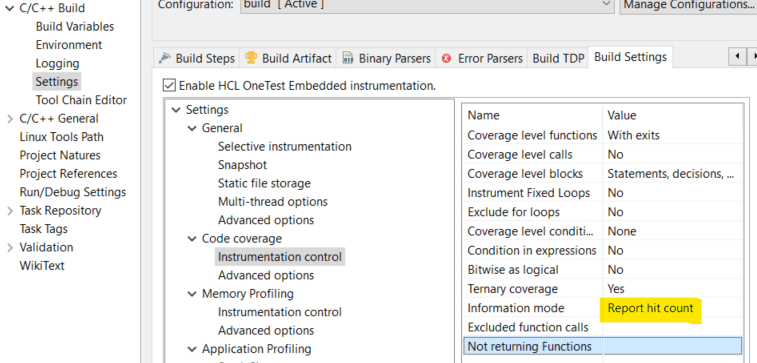
There are also other settings that affect how coverage is computed in that Instrumentation control group. See also Settings - General - Selective instrumentation for other settings that affect how OneTest Embedded performs the run-time analysis.
You can configure a TC so it builds an instrumented application by setting a few TC properties:
rtistcc -OTEPROJECT=\'<InstrProj>\' $(CC) where <InstrProj> is replaced with the name of the instrumentation project)rtistcc $(LD))Furthermore, to allow OneTest Embedded to compute coverage information also for states and transitions with empty code (for example a transition with an empty effect code snippet), it's necessary to add the following line in the TC for your application (in the Code tab):
tc.genEmpty = ['entry', 'effect'];
If you have many TCs to update it can be tedious to do it manually. To simplify there is a context menu command on a TC called OneTest Embedded Instrumentation:

This command opens a dialog where you can specify the instrumentation project to be used. You can also choose whether you want to update only the selected TC, or also all its prerequisite TCs. The latter is useful if you want to also instrument libraries used by the application. Before you choose to update a TC using this dialog, you may want to make a copy of it so that you also can continue to build regular (uninstrumented) versions of your application.
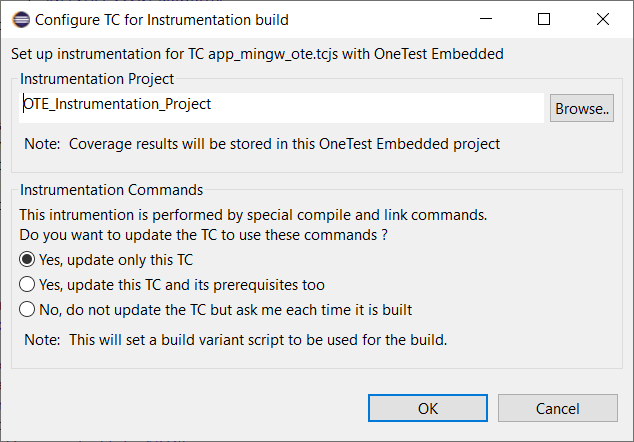
The dialog also provides a third option, where the TC will not be modified, but instead a dialog will appear each time you build it, asking if you want to turn on OneTest Embedded instrumentation or not. This option makes use of a build variant script, so you cannot use this approach if you are already using build variants. In that case you may instead choose to integrate the OneTest Embedded build variant script with your own build variant script, and then use the combined script as the new build variant script.