When working with Git, it is important to regularly check the status of your modified files. Typically, you want to understand:
The concept of the index in Git can be confusing for new users. Essentially, the index acts as a staging area that manages which changes will be committed to the Git history. In practical terms, a file (or directory) in a Git-managed file system can be in one of three states:
When using Git from the command line, the most commonly used command to check file status is git status. This command provides information about files that have been modified in your local working directory and shows which changes are staged in the index. In Model RealTime, you can access similar information using the Git Staging View.
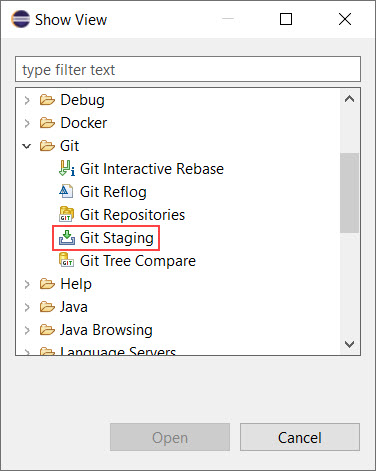
To access the Git Staging View, use the command Window → Show View → Other….
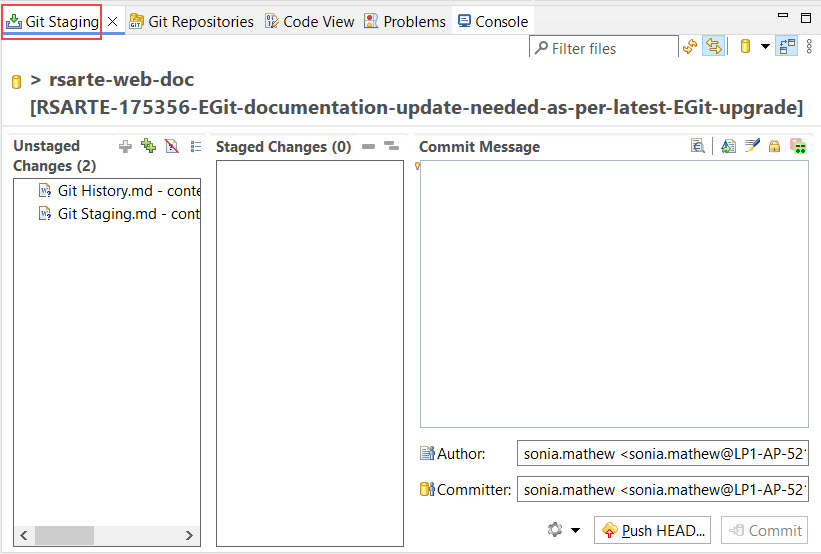
The Git Staging View contains two main sections:
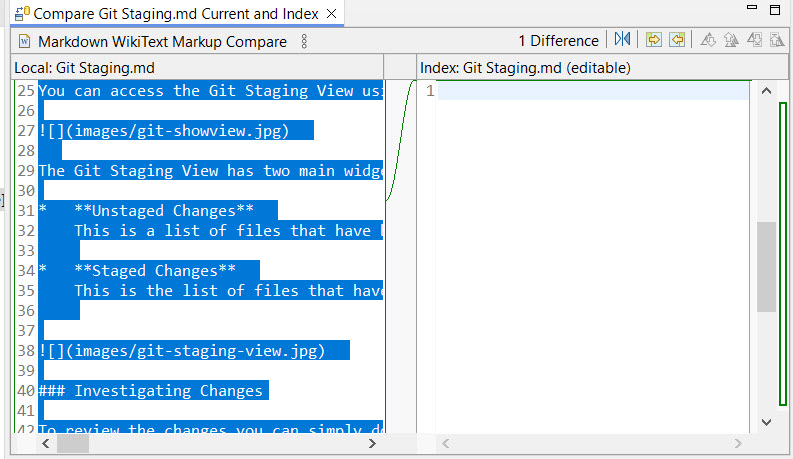
To review changes in a file, simply double-click on it. If it is a model file, the Compare editor will open, showing the differences between the current and previous versions.
For more information on using the Compare editor, refer to the Comparing and Merging Models document.
Before you can commit your changes, you need to "stage" them by adding them to the Git index. This can be done by dragging files from the "Unstaged Changes" list to the "Staged Changes" list. If you change your mind, you can easily "unstage" them by dragging them back.
To commit the changes to Git, click the Commit button after adding a description of the changes in the "Commit Message" area.
Typically, when you commit your changes, a new entry is created in the repository's version history (referred to as a commit). However, it is possible to modify the previous commit instead. To do this, click the Amend button.
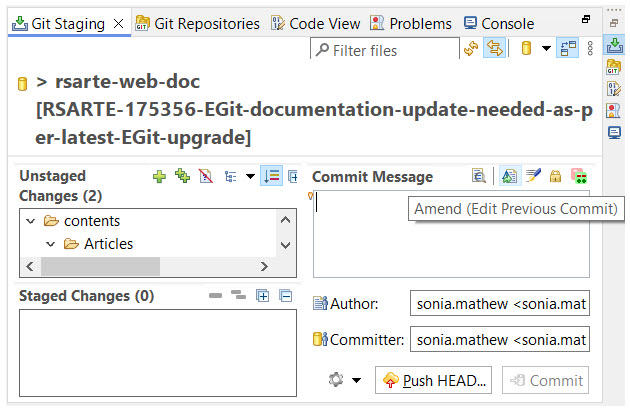
When you click the Amend button, the previous commit message will be restored in the Commit Message field. You can then edit the message to reflect the current changes you are about to commit. When you press the Commit button, a new commit will not be created. Instead, the previous commit will be updated to include your changes. This is useful if you forgot to include some changes in the previous commit or if you want to correct a mistake in the previous commit.