A good workflow in Git is to do most work on specific branches (often called "feature branches") and not directly on the master branch. Thereby your changes are isolated from the changes of others until they are ready to be delivered to the master branch.
While you are working on a feature branch you often want to incorporate changes done on the master branch (or another branch to which you plan to deliver your changes when they are ready). This is done using the Merge and Rebase features of Git. Both these commands will result in you having all changes from the master branch available on your working branch. The main difference between Merge and Rebase is in the details of how the resulting Git history will look.
If using Merge the changes on the master branch will be applied as one additional change after the changes you have done so far on your branch. In the history you will get a new commit with the changes from the master branch, but the branch otherwise looks the same. That is, your changes come before the changes from the master branch.
If using Rebase the changes you have done on your branch will be re-applied to the master branch, after all other changes done on this branch. In the history it will appear as if your branch started at a new later point on the master branch (i.e. it was rebased). That is, your changes come after the changes from the master branch.
Both Merge and Rebase can be performed using the Model RealTime user interface as well as the command line.
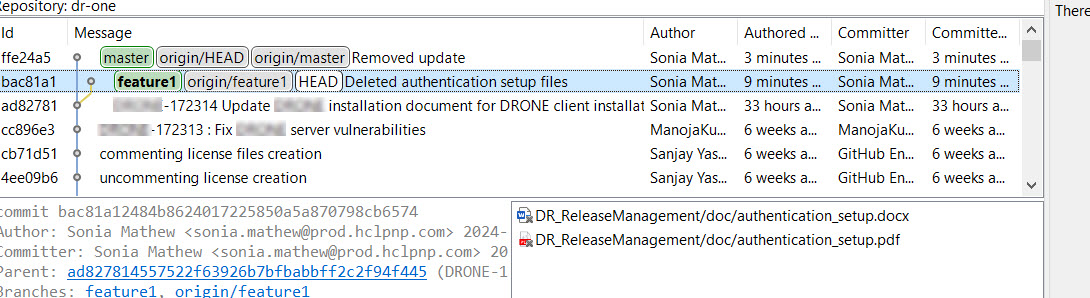
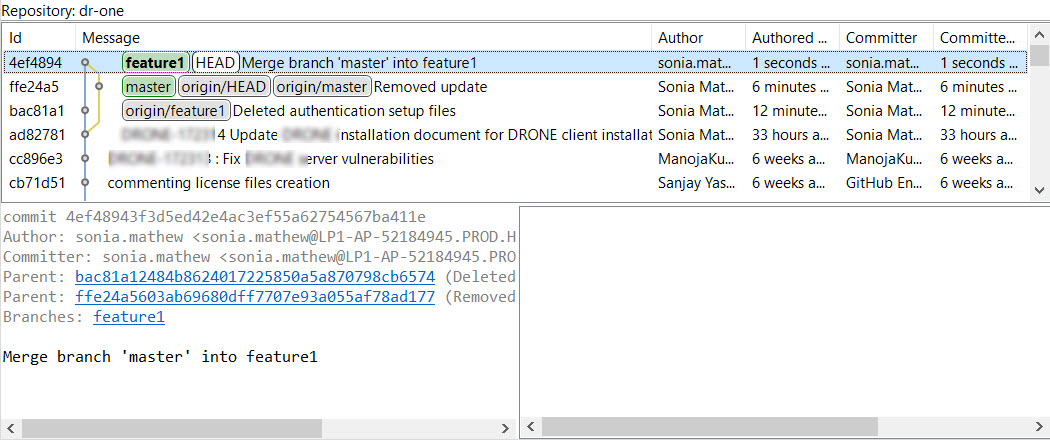
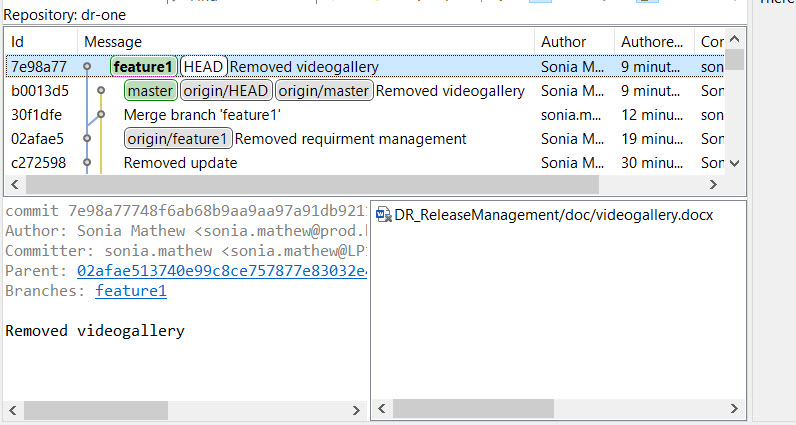
Let's look at a simple merge scenario. Assume that you are working on a feature branch "feature1" with the following simple history:
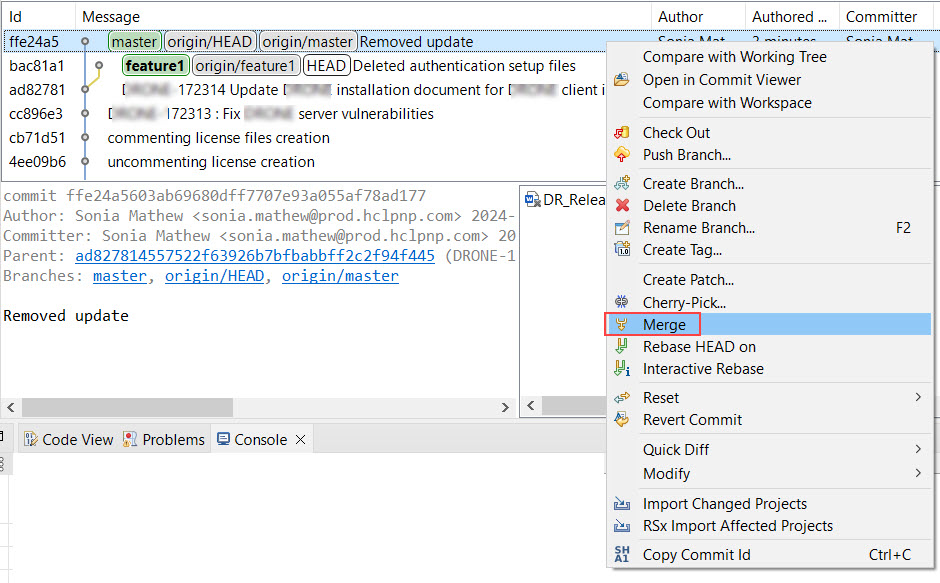
Let's use the Merge command. Merge can be invoked from the History view. Make sure you have the target branch (feature1) checked out, then select the source branch (master) and perform the "Merge" command from the context menu.
If you haven't changed the preferences in Team - RSx EGit Integration for "Merge kind selection" you will now be prompted by the Select kind of merge dialog about how to perform the merge.
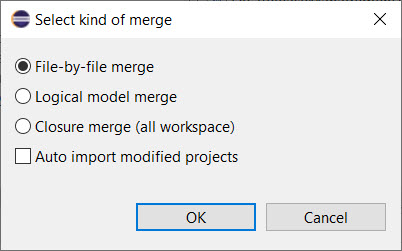
File-by-file merge merges all files that need to be merged using one merge session for each file.
Logical model compare groups files that are part of the same logical model, and merges these groups of files in one merge session per logical model.
Closure compare merges all files in a single merge session.
In most cases file-by-file merge is sufficient, and it also has the best performance. However, if you have done refactorings then the other options can be considered.
See the document Comparing and Merging Models for more information about the different kinds of compares.
The ”Auto import modified projects” is a useful feature if you only have a small part of the complete model loaded in your workspace. If you select this option all projects that are modified will be automatically imported into your workspace. This allows you to inspect the changes that were done after the merge is completed.
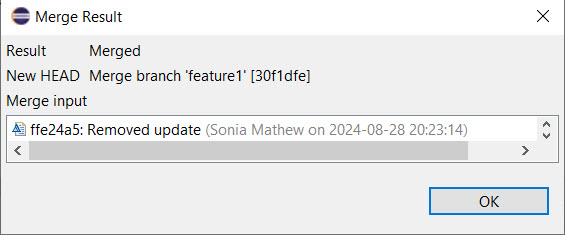
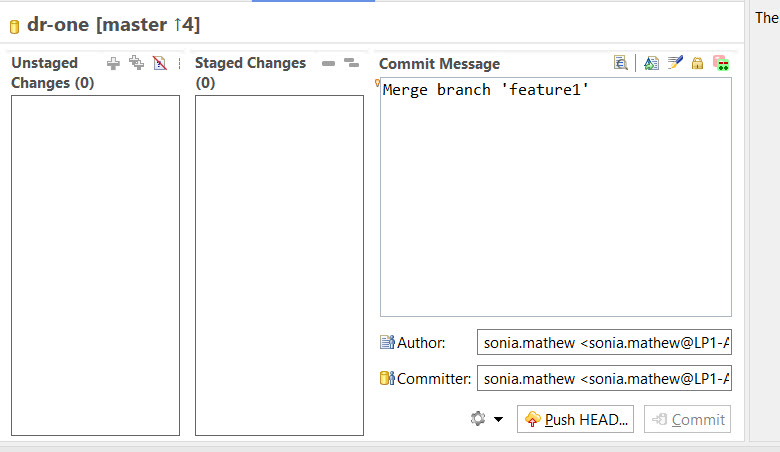
The merge operation itself is a silent operation that ends with a dialog showing the result.
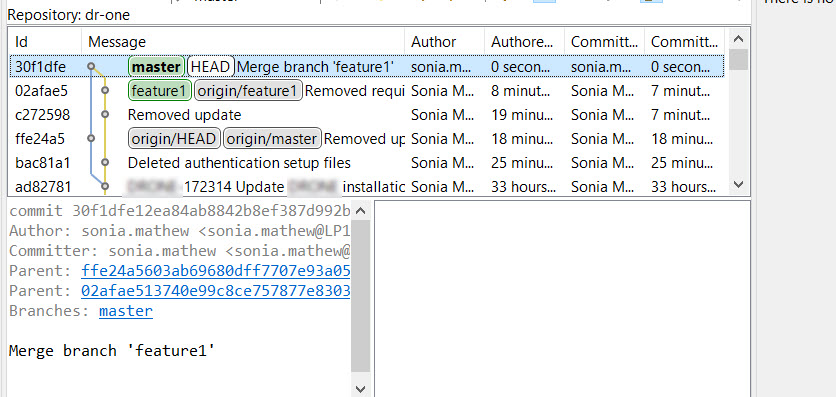
If there are no conflicts the new and changed files are committed and the History view now looks like this:
The same merge can also be done from command line using the command git merge
Now let's use the Rebase command instead for introducing the change from the master branch onto the feature branch. If you have performed a Merge but realize that you should have done a Rebase instead, you can easily revert the merge by right-clicking on the previous commit in the History view and run the context menu command Reset - Hard.
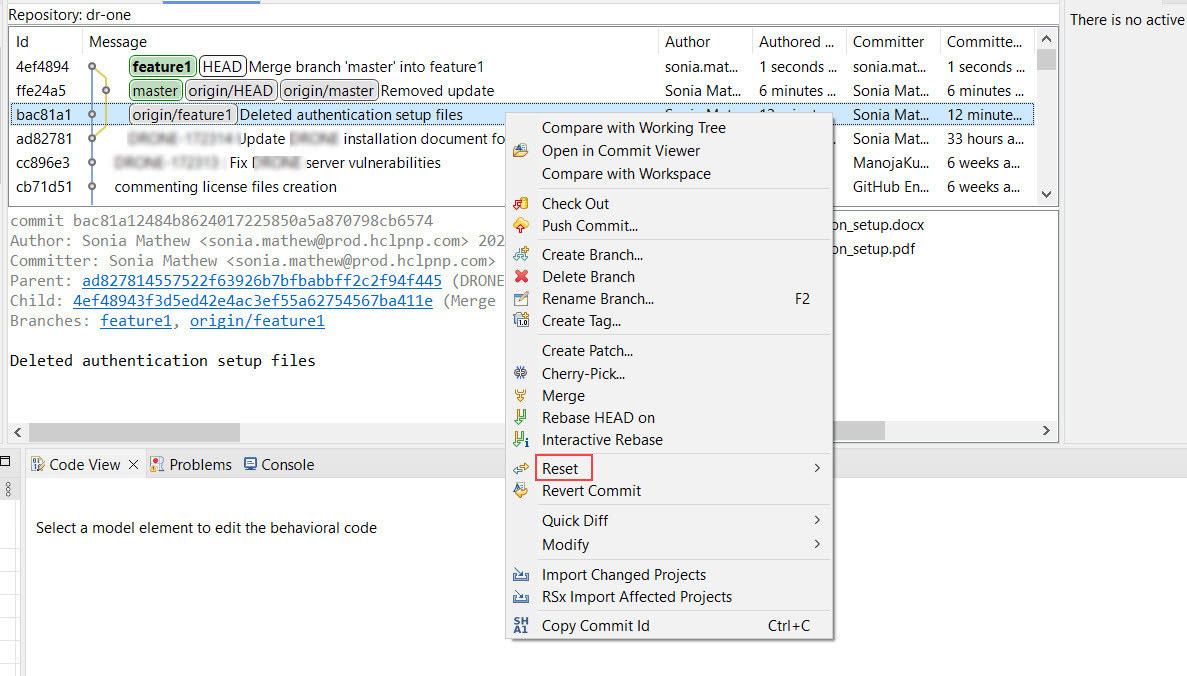
After resetting the merge commit we are back to the state prior to the merge, and can now instead use the Rebase command. With the target branch (feature1) checked out, select the source branch (master) and perform the "Rebase on" command in the context menu.
Just as when merging, you will be prompted to choose the merge type.
The resulting history shows that instead of merging the changes from the master branch to the feature branch, the changes you did on the feature branch have been re-applied onto the changes from the master branch. The base of the feature branch is now the "Retyped attribute" commit, i.e. it was rebased from the "Another mod" commit which was its previous base.

You can also perform rebase from the command line. The command to use is git rebase
Rebase is a possibility to create a nice and simple History view and is safe to use on local branches. However, be very careful if using rebase on a branch that is shared with other team members (see Collaborating within a Team using Remote Branches). If someone else has downloaded the branch and have it in their local repository, Rebase will cause problems. So, if you work in a team and share branches, avoid rebase, or make sure to coordinate the rebase so everybody involved will clone a new copy of the repository afterwards.
In a large organization, and as time goes by, it becomes increasingly important to have a reasonably simple version history with understandable commits. Often, the granularity of commits on a feature branch is smaller than what we would like to have on the master branch. To overcome this problem Git provides a possibility to rewrite history during merge and collapse several commits into one commit. This is done using Squash Merge and is typically done when merging changes from a feature branch to the master branch (i.e., when your feature is ready to be delivered).
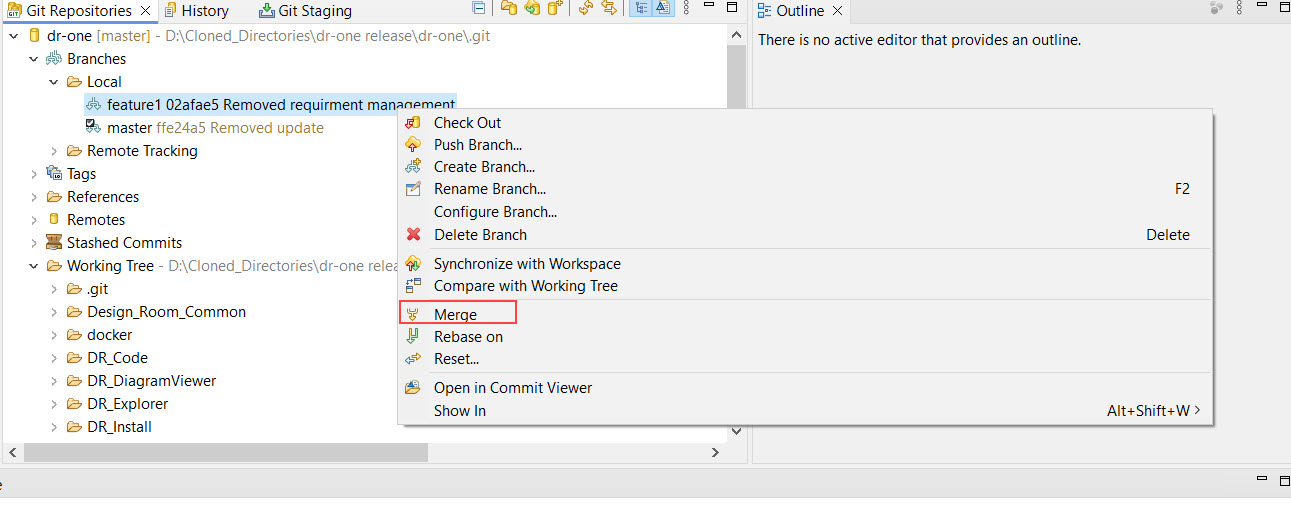
To merge our changes to the master branch as a single commit we can perform a merge from the Git Repositories view. First checkout the master branch, then select the feature branch and perform the Merge command from the context menu.
The result after the merge is that all changes from our feature branch are merged to the master branch, but the result is not committed. This give us an opportunity to commit the changes ourselves, using a suitable commit message that describes the changes as a whole.
This results in the following history:
Note that others in your team will only see your changes as a single commit on the master branch, since they will not see your feature branch (unless it is explicitly pushed to the central repository and pulled by others).
Sometimes you may want to merge only one specific commit from another branch onto your current branch, rather than all commits on that branch. Git supports this through the Cherry Pick command. In Model RealTime we can cherry pick a commit from the History view.
Assume we are working on a maintenance branch where we want to include a few important bug fixes. One of the bug fixes we would like to include happen to be already delivered on a feature branch "feature1" in a commit "Yet another fix".

To cherry pick this commit into the maintenance branch we select the "Yet another fix" commit and perform the command "Cherry Pick" from the context menu.

Interactive Rebase is an advanced Git command that combines a regular rebase with squash style merge and some aspects of cherry pick. You can use this as a convenient short-cut if you want to re-apply a series of commits (like in a regular rebase), but in the process also want to change the commit history (like a squash merge), selectively include or not include specific commits (slightly similar to a cherry pick) and even change some of the commits (like an amend commit operation).
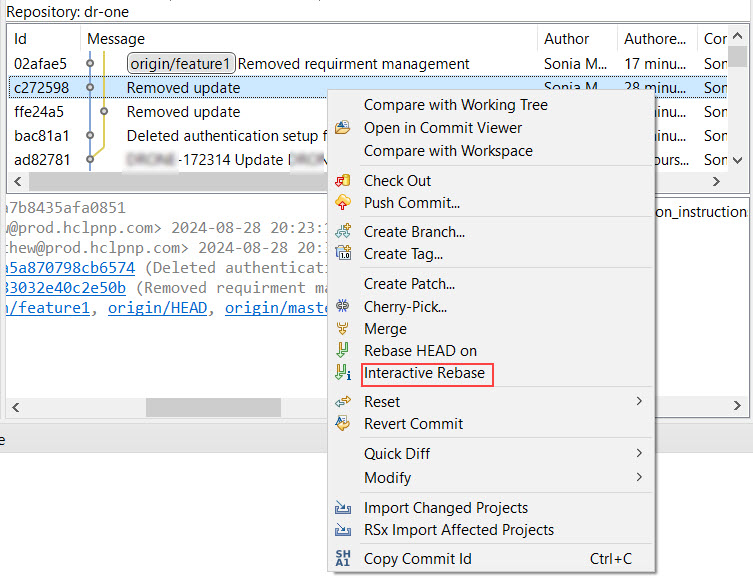
You start an interactive rebase by checking out the branch you want to modify. Then use the History view to select the commit from where you want to change the commit history and perform the ”Rebase Interactive” command from the context menu.
Here we will perform an interactive rebase to rewrite the history of the feature2 branch. Just like a regular rebase, an interactive rebase may involve merging so you will be prompted about which kind of merge to use.
The interactive rebase is controlled from the Rebase Interactive view.

This view lists all the commits that follow the selected commit on the branch. For each of the commits you can now decide the action to perform. The following actions can be chosen:
**Pick
**Keep the commit as it is. This is the default action.
Skip
Remove the commit from the history.
Edit
Make a pause before the commit so you can add additional changes to it.
Squash
Combine the commit with its predecessor. Also allow the commit message to be edited.
Fixup
Combine the commit with its predecessor, and use the predecessor's commit message.
Reword
Make a pause before the commit so you can edit its commit message.
Press the Start button to start the interactive rebase. All the steps in the view will be performed in the specified order. The resulting history will look like this:
For more details about interactive rebase take a look a the EGit user guide.
A word of warning: Avoid using interactive rebase on a branch that you have pushed to a remote repository and are sharing with other team members. Rewriting the history for a remote branch may cause serious problems for everybody that has pulled the branch to their local repository.
In the above example we used interactive rebase to rewrite the history of a single branch. Of course you can also select a commit on a different branch. In that case the interactive rebase will start by checking out that branch and then allow you to set the actions for all commits that are present on both the branches (after the common commit from where the two branches originate).